Step #1: Pick Your Products
Food and alcohol spills, scratches, dents and dings: Your tables are likely the hardest working piece of furniture in your home. Ensure lasting results by choosing high-quality products.
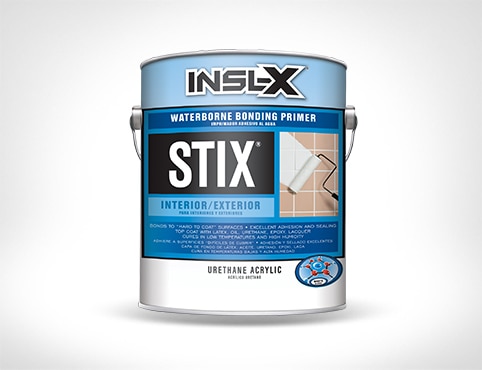
- Prime wood or laminate tables with INSL-X STIX Waterborne Bonding Primer, which offers powerful bonding properties—especially important for painting over existing finishes. If a stain-blocking primer is needed, use INSL-X Prime Lock Plus Primer instead.
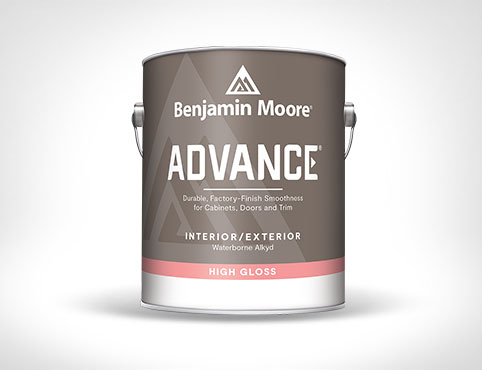
- For the best paint for a wood table, homeowners love ADVANCE Interior paint, which provides a premium, furniture-like finish. ADVANCE also works well for laminate tables.
Helpful Tip
Block-resistance is key: Blocking is when a plate, vase or any object sticks to the surface of your painted table. Premium quality products help “block” this pesky problem.Step #2: Clean the Table
- Cleaning is always critical for a successful paint project, especially when it comes to painting a dining room table or a kitchen table.
- Place a drop cloth under your table to catch any dust, debris or errant paint product.
- Oil and grease can quickly build up on a table. Use a detergent-type of cleaning product and damp rags to remove these contaminants.
Helpful Tip
Remove the leaves to reach the leaf edges so you can clean and sand them.Step #3: Sand and Clean Again
- Once the table is totally clean and dry, it’s time to sand it, especially if it has any kind of glossy finish.
- Sanding is only required if your table was previously painted or finished with a high-sheen product. A few passes should be enough to dull the surface.
- For sanding, we recommend using a medium 180- to 220-grit sandpaper to dull the table’s surface and legs. It is not necessary to completely remove the existing coating if there is one.
- Once sanding is done, it’s time to clean the table again. Vacuum up any sanding debris and wipe the table down with damp rags or a microfiber cloth.
Helpful Tip
For most table repainting projects, you don’t have to completely remove the existing coating: Simply dulling the surface is sufficient.Dulling a finish by sanding is a relatively quick process: A couple of passes with sandpaper and the job is done.
Step #4: Prime the Table
- For priming and painting, we recommend using a 4- to 6-inch fine-finish roller for the top of the table, and a paintbrush for the legs if there is detail that is difficult to paint with the roller.
- Apply an even coat of INSL-X STIX Waterborne Bonding Primer to the top of the table first, then work your way down to the table legs. STIX primer provides an extremely hard film, so it’s great for hardworking tables.
- Allow the primer to dry.
Helpful Tip
Do not apply heavy coats of primer or paint on the inside edges of the table leaves, as they could stick together. Use a lighter hand in these areas.Step #5: Paint the Table
- Apply an even coat of ADVANCE Interior paint to the top of the table with a roller. ADVANCE offers a furniture-like finish that easily withstands wear and tear, and is available in any Benjamin Moore color.
- Switch to a paintbrush to apply an even coat of paint to the table sides and legs.
Helpful Tip
With high-quality paint products, less is more: Thin layers of paint are best. Heavy paint application on horizontal wood surfaces may lead to cracking and marks on a wood table.Step #6: Let Dry and Apply a Second Coat
- Check the back of the paint can for the product’s maximum recoat time and follow it—don’t rush it! Some paints, like ADVANCE, can take up to 16 hours to dry.
- Applying a second coat of paint too soon will extend the table’s cure time (the amount of time before you can use it again). A rushed second coat will likely affect your end result negatively.
- Once you have waited the maximum recoat time, apply an even second coat of paint the same way you did the first.
Step #7: Allow the Table to Cure
After priming and applying two coats of paint, your table needs time to cure.
- Cure time is the amount of time you should wait before returning your table to everyday use. The optimal cure time for ADVANCE Interior paint is three to five days.
- Wait until your table has cured completely before placing anything on it, as this could damage the table if it has not fully cured.
Try Another DIY Project!
Tackle your next DIY project with ease and get ideas and inspiration in our how-to interior, exterior and DIY sections.Love the look of natural wood? Check out How to Refinish Wood Furniture, and turn to How to Paint Furniture for even more tips and advice.
As always, visit your local Benjamin Moore retailer for help with all your painting needs.
